New to This Technorati Thing

Hey, I’m claiming my blog on Technorati. Check out this blog’s profile.

As near as I can tell, it says that I’m a rank amateur. I’m trying to make this blog a bit more professional, and also a bit more appealing. Look for some changes and hopefully more frequent posts in the coming weeks. My goal is to break into Technorati’s top 1,000,000.

Blog Carnival Participant

Up until recently, I wasn’t too sure what a blog carnival was either. I still don’t know all the details, but it boils down to a bunch of “link love,” as they sometimes call it when blogs link to each other. The host blog defines a geographical area, Hawai’i in this case, and asks bloggers in the area to submit an existing post of their own to a sort of blog roundup. The host then creates a new post that summarizes all the submissions, allowing people to discover their blog neighbors.

So last month, Evelyn of homespunhonolulu.com emailed me to ask if I’d like to participate. She hosts a monthly blog carnival for Hawai’i entitled Carnival of Aloha. The rest of the time, she blogs about events for local people on Oahu and also about the small details about life in Hawaii, such as her recent in-depth post about honey from the Big Island.

Anyways, I liked the idea of gathering a random bunch of blog articles showing the many facets of blogging in Hawai’i, and so I submitted my recent Kalalau article for consideration. Oahu blogs dominate the published blog carnival for October, but there I am in the middle, along with a couple of other Kauaian bloggers and a big slice of life from across the islands.

If you write a blog in Hawai’i or about Hawai’i and would like to join the carnival, see Evelyn’s instructions and submission form. And if you just want to find some new blogs or articles about Hawai’i, here’s the link to her monthly Carnival of Aloha posts.

Kaapoko Tunnel Hike (part 2)

Read the beginning in part 1.

Most people have heard there’s a second tunnel, but its wherabouts are not very clear. The Ultimate Guide barely mentions it, and some think that the curvy parts of the first tunnel count as the second. Others correctly conclude it lies on the other side of the Hanalei river, but don’t know where to look. The first time I did this tunnel hike, I started too late to even go looking for it. This time, my friend Adam and I were determined to find it.

So let me repeat my disclaimer warning, and then follow me:

WARNING: hiking off-trail, crossing rivers, and entering abandoned tunnels are dangerous activities. Unmaintained use-trails have many hazards including eye-level sticks, slippery mud, drop-offs concealed by vegetation, and more. Rivers can flood quickly to trap you on the other side. Waterfalls sometimes carry rocks with fatal consequences. Never free-climb volcanic rock because it is unstable. Take plenty of water (or a water filter), don’t forget your flashlight, and turn around to return before dark. Exercise caution and proceed at your own risk.


Across from the house-sized boulder on the Hanalei River, look for a use trail up onto the river bank. Walk past two distinctive clumps of bamboo (I’m starting to think that hunters plant it for sticks), and on up into some really dense grasses (Job’s Tears, actually). The trail really gets lost in here. If you bear left towards the sound of the river, you’ll come out near this waterfall. It is in fact the weir that used to catch some river water and channel it into the first tunnel.

Again, find a use trail that heads away from the river and up the bank. At one point, you’ll be on a ledge over a big drop-off to your left, half-hidden by vegetation–I think that is the ditch or channel coming out of the second tunnel. Alternatively, if you bear right in the Job’s Tears, you should find a use trail that will also lead to this cement wall without the danger of the drop-off. The ladder is on top of the wall and takes you down into a water and grass-filled ditch.

Inside the second tunnel, the roof was lower and the water was deeper than the first. The average height is around five feet, meaning you have to walk completely hunched over for 3/4 mile (1.2 km) each way. The water is about a foot deep (30 cm) or calf-height at the beginning. It also has a mucky bottom, and I was glad to have the tabis (they soak through, but they don’t let mud in).
I had also heard there were some obstacles that caused some to turn back, although one source pointed out that the rockfall was old and implicitly stable. Not very reassuring, but that was in fact the case. As shown in this photo, the fallen rocks have been piled on the side of the tunnel, and the path snakes easily through the piles. I did not see any evidence of fresh rockfall.


The rockfall, however, raised the floor of the tunnel so the water in the middle third of this tunnel is deeper and muckier. You have to walk a long ways in 2-foot ( 65cm) deep water, and it’s cold, which almost gave me cramps. The deepest is around 3 feet (1m) deep, almost waist-deep for me, when you have to climb over the first series of wooden braces. They seem sturdy, but they are obviously holding back more crumbly rocks. The second set of braces are in shallower water already (photo above), and they are easier to step over.

This tunnel is also perfectly straight, so you can see a light the whole way. The tunnel is actually shorter than the first, but the light is fainter because the opening is smaller. I don’t actually remember if there was waterfall at this exit, but I think not. Again, turn left before the exit and the tunnel continues, then it goes up a short slope before really ending. If the TV show “Lost” could get to a place like this, I’m sure they’d be tempted to use it in some strange plot twist. In any case, take note of the exit so you can find it again.

Go straight ahead from the tunnel exit over some rocks to the stream—this is the waterfall you’ve been waiting all day to see. The Ka’apoko stream bounces through a moss-covered cleft in the rock, with water raining down from the overhang.

The overhang is quite impressive, a couple we met this day who also made it through the second tunnel said it reminded them of the cliffs and waterfalls of the Pacific Northwest. The rainfall in this part of the island is probably equivalent.
The constant dripping creates a sort of fern grotto, quite like the more famous one on the Wailua river, only prettier because of the orangish colors and the stream cascading down the rocks.

Climbing up the stream, you can easily reach the waterfall and small pool. The pool looks nice and refreshing, but after walking for so long in the cold water, I didn’t feel like swimming.

We then climbed up a little until we could get a view out of the valley. Here you can see a peak called Kekoiki (2874 ft, 876m) that is part of Mount Namahana, an inaccessible mountain above Kalihiwai (between Kilauea and Princeville). The ridge in between is the one with the Powerline trail, we could barely see the huge powerline pylons.

Back beneath the overhang, we found the entrance to the mythical third tunnel. This one is more roughly-hewn, nowhere near as well-shaped as the other two. It does have 3 windows, as it seems to run parallel to the valley at first.
The tunnel turns left to go under the ridge, but is blocked shortly thereafter by a large rockfall. The rock that has fallen from the ceiling is soft and spongy, not a good material for tunnels. You could climb over it, but the water on the other side is deep and no exit is visible, so my preservation instinct told me to turn around here.

On the way out of the third tunnel, the opening framed the waterfall beautifully.


By then it was 2 pm and time to head back. From the clock on my camera, the second tunnel takes about 30 minutes to walk through. Back at the Hanalei River, we found the trail that takes us straight through the Job’s Tears back to the house-sized boulder. This photo is looking across the river at the side-stream with the pink flags that lead back up to the first tunnel.

The first tunnel is longer but easier and took us just under 30 minutes. Then we put back on our wet pants and wet socks, laced up our muddy boots and faced the mud again. The mud was actually worse than before because we met at least 9 people who had churned it up and trampled the small footholds.

The hike out took us over 2-and-a-half hours (1 mile/hour), so be sure to save time, energy, water, and snacks for this difficult section. Soon after exiting the tunnel, on the slope down to the big stream, there are some nice views across the eastern lowlands. The closer knob is Hanahanapuni, a small volcanic cone that you drive past on the dirt road. In the distance is Kalepa Ridge above Hanamaulu. This area does have cell phone reception because it’s a direct line of sight to a cell tower.

Other Hike Reports

  • There are two short YouTube movies (1 and 2) of the Ka’apoko waterfall after the second tunnel.
  • Tripadvisor.com has some threads of people asking for information, only this one had useful information. Another one has more details, but the author was confused by the pink trail markers. I found the markers very helpful and, as mentioned above, only lost them in the dense Job’s Tears grass—but don’t rely on them because sometimes the hunters remove them.
  • This hike report has some nice photos from the first tunnel, but this photo has me believing they exited early, took the little trail, reentered, and counted that as the second tunnel.
  • This review also criticizes the Ultimate Guide for its inadequate description of this trail and its recommendation to wear Tevas.
  • Here’s another trip report that also does not recommend open sandals (Tevas) for the mud. He has some photos and an anecdote about a helicopter rescue on this trail.
  • This guy was even worse informed: he went with flip-flops and ended up hiking barefoot. To his credit he tried again (twice) and finally made it through. However, he seems to be the source of the misinformation about exiting and reentering the first tunnel instead of following it to the left—do not follow his advice.
  • This one has some good pictures, and he obviously found the 3 tunnels, though he counts them differently. However, many of his estimated measurements are inaccurate.
  • And finally, just because I love ditch, tunnel, and waterfall hikes, here is another one (and somebody else’s photos) that I found on Madeira, the Portuguese island off the coast of Africa. Most of Hawaii’s Portuguese immigrants came from Madeira because the sugar industry that sponsored them realized they would already be familiar with living on a tropical island. It also seems like they were adept at creating irrigation works, which may explain the genesis of the Kaua’i tunnels in the first place. In any case, Madeira is definitely another beautiful island.

Kaapoko Tunnel Hike (part 1)

Earlier this summer, Kris wrote to ask:

On January 10 you blogged about Kalalau and mentioned in passing to ‘remind me to blog about the “tunnels” hike someday’. I hope that day is soon – I’d love to hear your thoughts about that hike.

Ahhh, the “Secret Tunnel to the North Shore,” sooner or later, everyone asks me about that one. The Ultimate Guide revealed this hike to the world, but somehow their three-page description fails to capture the difficulty. Frankly, it is the hardest trail on Kauai, and one of the most difficult I have ever done, period (your mileage may vary, as they say).

You do reach some wild and beautiful places, but the trail just to get the first tunnel is a 2.25-mile (3.5 km) slog through mud and brush. There are rivers to cross, mud bogs to go through, branches to duck, slippery slopes, and lots of humidity and frequent rain. It can be very frustrating, and if you’re not ready for it, you won’t have fun at all.

My own wife who has done some crazy things with me won’t go on the Tunnels because she just doesn’t think it sounds worth it. There are other more accessible waterfalls just as spectacular, for example Hanakapiai, though that can be a mud bath too. The inaccessibility and remoteness of the tunnels is an appeal to some people, mostly guys it seems, but I also just like tunnels.

Lastly, the Ultimate Guide has an unfortunate tendency to rename hikes, so I would like to reinstate the original name. Ka’apoko is the name of the stream after the second tunnel, and after reading around on the internet, it seems this is what hunters called the trail.

After an important message, I give you my photo-description of the trail.

WARNING: hiking off-trail, crossing rivers, and entering abandoned tunnels are dangerous activities. Unmaintained use-trails have many hazards including eye-level sticks, slippery mud, drop-offs concealed by vegetation. Rivers can flood quickly to trap you on the other side. Waterfalls sometimes carry rocks with fatal consequences. Never free-climb volcanic rock because it is unstable. Take plenty of water (or a water filter), don’t forget your flashlight, and turn around to return before dark. Exercise caution and proceed at your own risk.


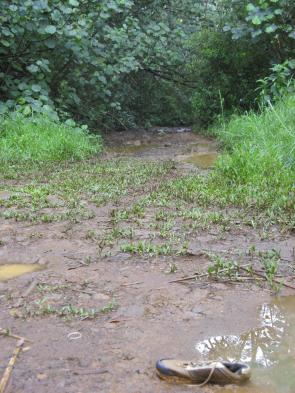
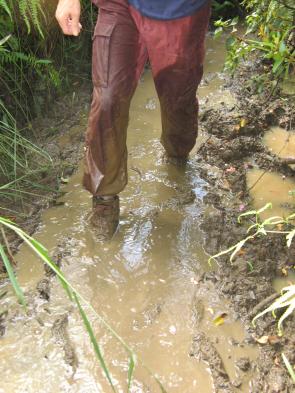
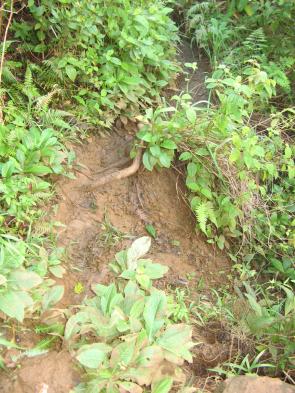
This is the trailhead, consider the shoe stuck in the mud to be a warning. You start walking on this muddy road to the river, and to my great surprise, I have seen hunters drive on it.

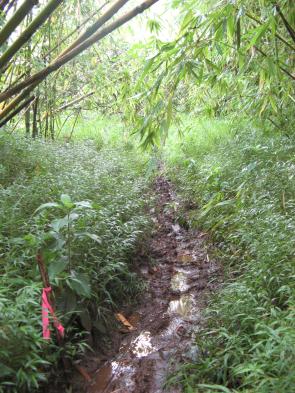
Cross the two branches of the river just above where they come together and head into the bamboo forest. There might be pink trail markers to follow, but don’t rely on them.


Instead, follow the old log trail. You know you’re on the right path when you see these logs buried in the mud. It’s also frustrating to see how the once-maintained trail is grown over.

The first half of the hike also goes by old telephone poles, or the stumps thereof. These are near to tops of hills and usually provide the only views out of the thick forest cover. I assume they once carried the wire for a stream gauge signal.


Get used to the mud. Most of the time, it’s easier just to go right through the middle while looking for submerged rocks and logs. If you do have hiking boots, it’s best to avoid overtopping them.

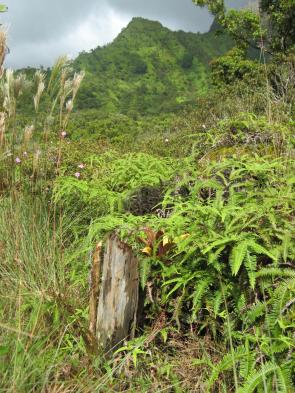
Some parts of the trail are idyllic, this is near a small stream crossing. I like to think this is what the rain-forest would look like without the invasive guava choking out the native plants.


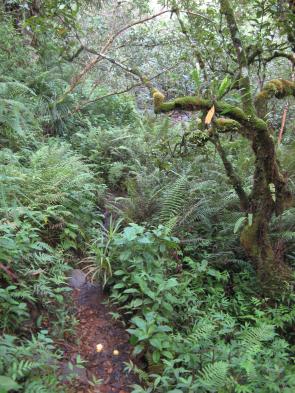
The second half of the hike is a little bit more open, though the ferns are more scratchy. Note that it is still muddy.

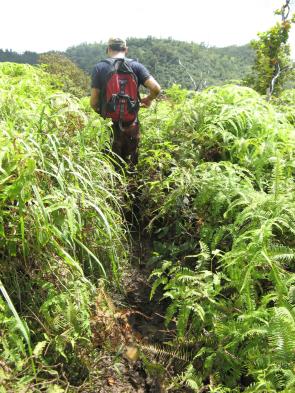
This picture is straight, the trail is slanted. This creates many places where you slide down 3 feet (1 meter) and climb back up.


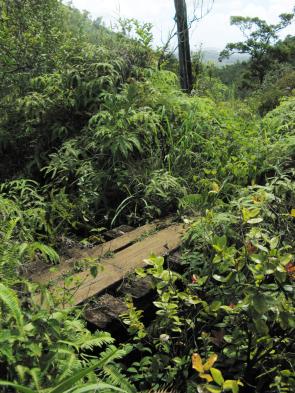
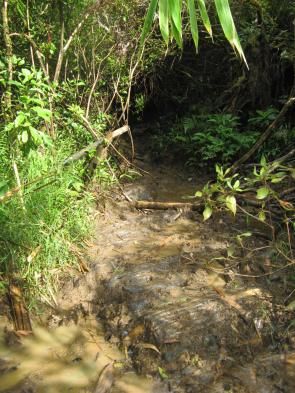
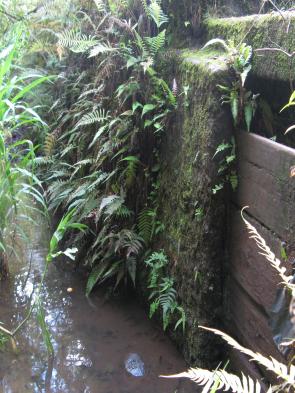
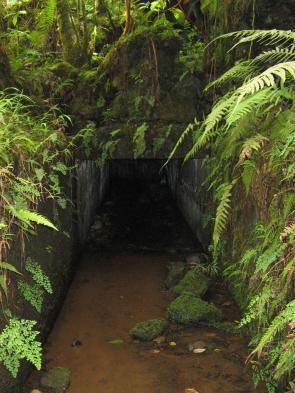
After paralleling then crossing a large stream (the north branch of the North Fork of the Wailua River), you climb uphill a while and finally see this wooden bridge over the ditch 15-20 (5-6m) below. Cross the bridge and follow the ditch to the left. Don’t go straight, which drops you into a gully.

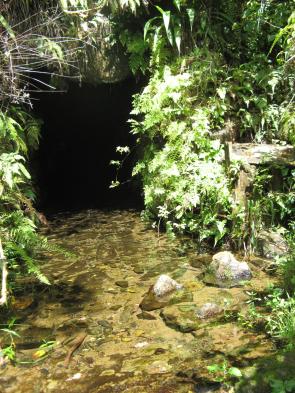
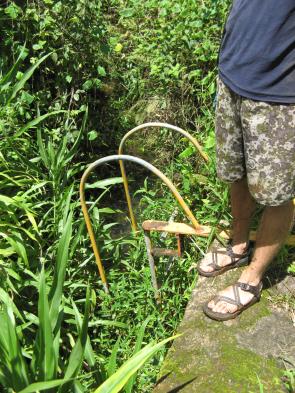
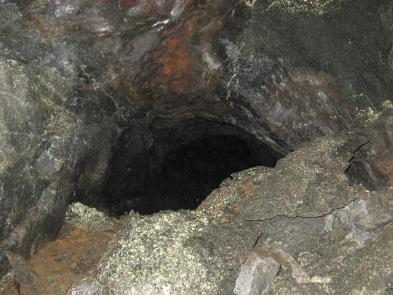
Soon you will see the entrance to the first tunnel, but remember, the mud is deepest right before the tunnel. The shack for the stream gauge is lying in the ditch now, it used to stand on the platform to the right of the tunnel. If you came in hiking boots, you’ll need to leave them here and put on water shoes.


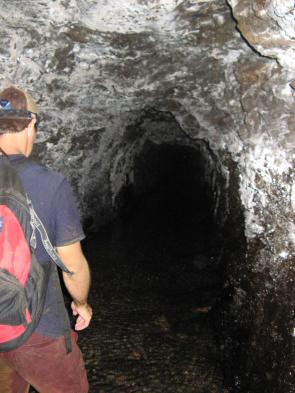
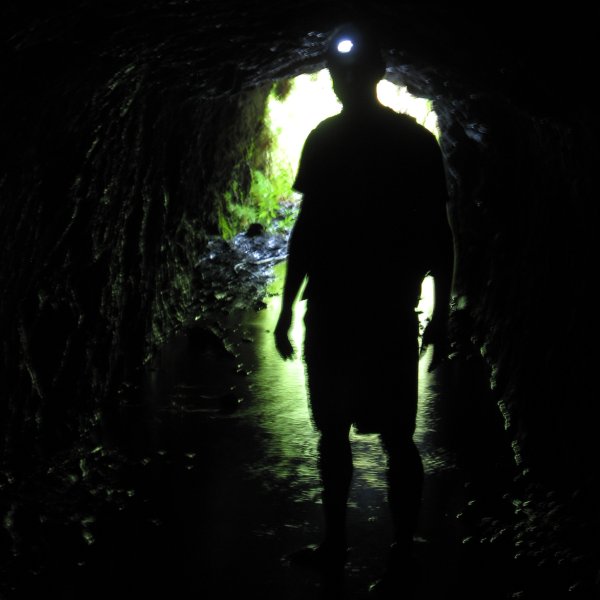
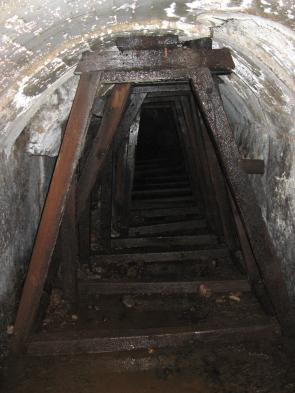
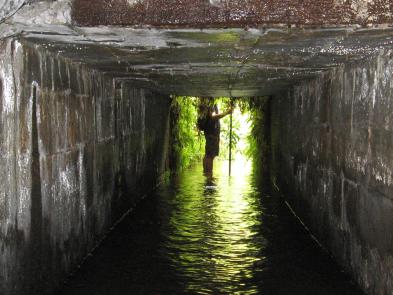
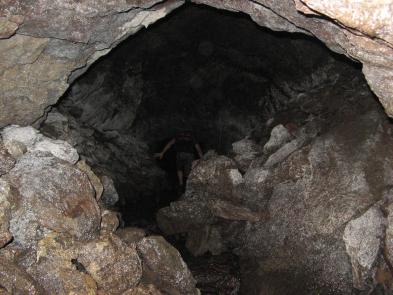
The first tunnel is about 6 feet (1,80 m) high on average, with some low spots so most people have to walk hunched over just to be safe. The water is 1-9 inches (3-22 cm) deep and the bottom is rough and rocky. The second half of the tunnel also has submerged railroad tracks, so watch your toes if you have open sandals.

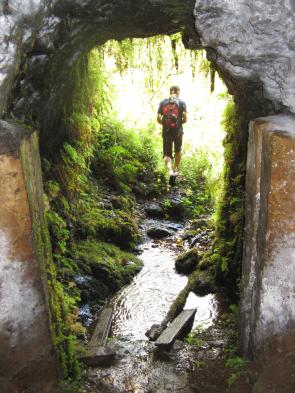
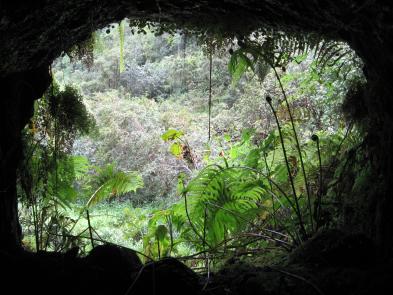
What’s reassuring is that the 0.9 mile-long (1.5 km) tunnel is perfectly straight and you can see the light at the other end the whole way. It takes 20-30 minutes to reach that light. When you get there it is like a door onto another world.


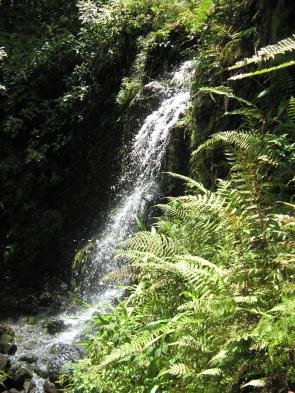
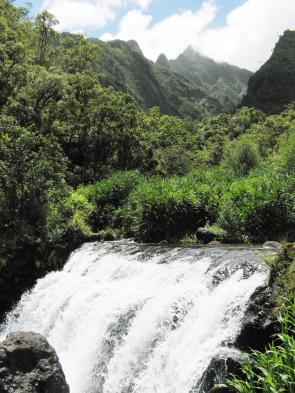
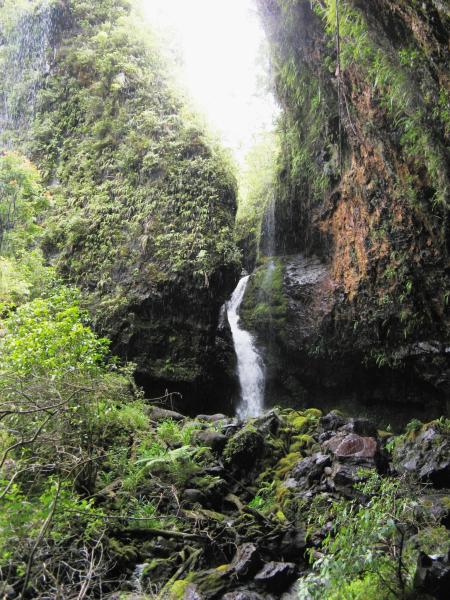
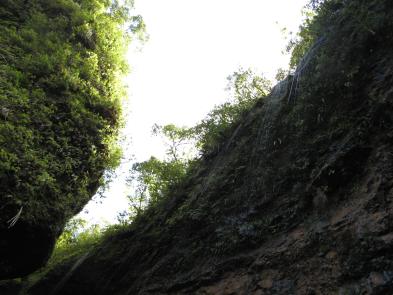
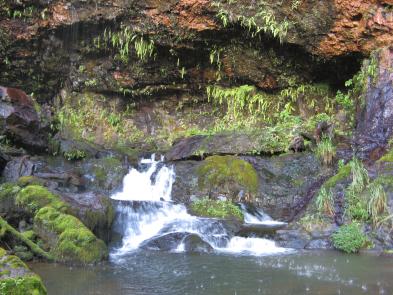
In fact, there is just a little waterfall outside, but still very pretty. Unlike some hike reports, do not leave the tunnel here to follow a steep little trail. Instead, turn left just before the exit and follow the tunnel around to a second opening with a second waterfall (this photo).

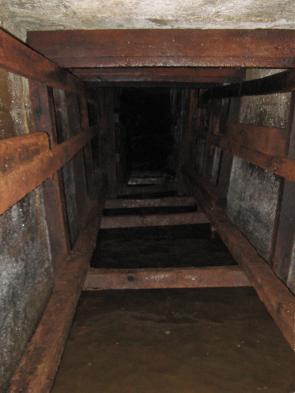
Do not exit there either, but turn left again to go through another leg of the tunnel that begins with these wooden braces. Unlike those other reports, they seem solid to me, but please step over them, not on them. All these turns in the tunnel are actually a second tunnel dug to avoid a section that collapsed long ago.


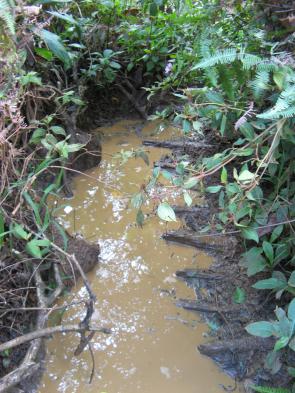
Soon you’ll be out of the tunnel and staring at the old ditch that used to be filled with water. Some descriptions have you climb over the wall and go down to the river.

When I went, the pink flags led in the ditch, through a short bonus tunnel, and then down a stream to the Hanalei river at the point in this photo. If you climbed the wall, you’ll end up downstream of the house-sized boulder.

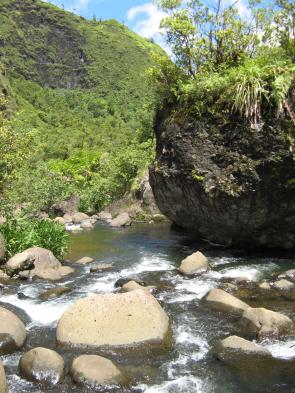
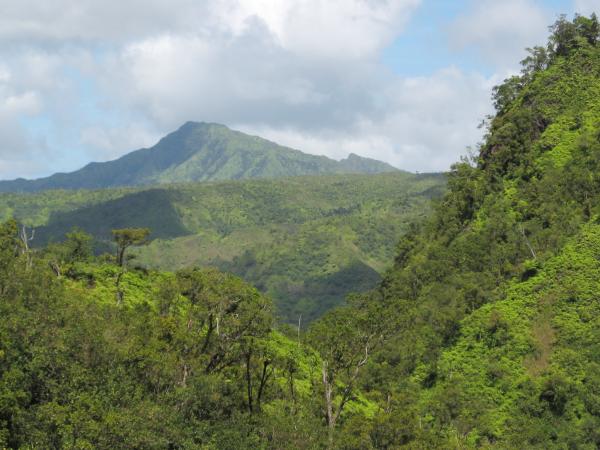
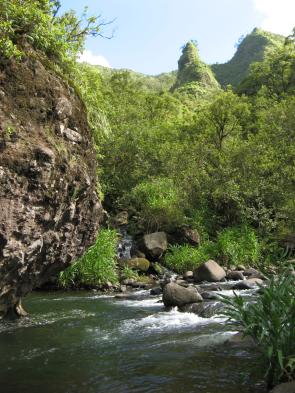
The first time I went through the tunnels, it was a gray and rainy day. This trip was much more sunny, ideal even. I went downstream a ways and climbed on another huge boulder and was rewarded with a view up into the headwaters of the Hanalei River:

I believe the point half-obscured by a cloud is the north face of Pohakupele (Pele’s Rock), and further to the right is the seldom-seen north-east face of Waialeale (or more precisely, of the ridge that extends northwards from Waialeale). It had rained hard the night before I went, and while that made the trail extra muddy, it also made for more waterfalls in the mountains.

In part 2, we go through the second tunnel and beyond…

Preparation

This hike has two distinct parts, which adds to the difficulty if you’re not prepared. The forest is usually hot and humid and requires sturdy shoes. The tunnels are cool and humid, requiring water shoes of some sort. Here is what I took:

  • Because of the humidity and effort, you’ll sweat a lot, so take plenty of water. I carry a 1.5-liter bottle and a water filter (with purifying drops). I had to refill twice during the day, which means I drank over a gallon of water.
  • Long pants and long sleeves are helpful against the scratchy bushes and ferns. Your clothes will get soaked from puddles and from dew or rain on the plants. A non-cotton micro-fiber shirt really helps to keep you from getting cold once you go in the tunnel. Against all fashion sense, I also wore zip-off pants that worked well since I could take off the wet legs before going in the tunnel. Alternatively, you could pack a bathing suit or board shorts for the tunnels.

    Your clothes will be wet and dirty throughout the hike, and you’ll probably have to put them back on when you hike out, so get used to it.

  • I took gloves this time and found them useful to avoid thorns (from invasive lantana) when grabbing for the bushes and branches, as you will inevitably do when you slip. Tight-fitting canvas work gloves are probably best, leather will get ruined by the water, and open fingertips are not necessarily better.
  • Shoes are a matter of personal experience. I prefer good ankle support and protection, so I hike the muddy trail in full waterproof hiking boots. I managed to keep the mud out, but water will still drip in the top, so be sure to take precautions such as sock layers if you’re subject to blisters.
  • The water in the tunnel is too deep for boots, so I always bring Japanese tabis, which are felt-soled water socks. They worked great for crossing the Hanalei River and walking in the muck of the second tunnel, but the soles are too thin for the rocks of the first tunnel. Closed-toe water sandals would perhaps be best for the first tunnel, but you’ll have to put up with mud between your toes in the second. I need to look around for some thick soled tabis.
  • My favorite flashlights are the tiny LED headlights. They’re not very bright, but they take up no space and they last forever. The bulbs can’t break, and they stay lit enough to walk even when the batteries are discharged.
  • I’ve hiked this trail with and without a stick. In some places it really helps to balance yourself in a mud puddle or vault over a slippery area. In some of the more frustrating places, it’ll get caught on the branches and be in your way. But it is useful in the tunnel to walk hunched over and take some weight off your feet. Make sure the stick is sturdy and short, 3-4 feet (1-1,30m), to avoid get caught in tight places.
  • Don’t forget to leave a change of clothes and shoes in your car at the trailhead, along with some water.

Octopus Tree

The octopus tree is one of those non-native species that most people see as typical of a tropical climate like Hawaii. Known as Schefflera and umbrella tree on the mainland, many people recognize it as a typical house plant that grows wild here. But most mainlanders have never seen it in bloom, and right now is the season for it. This one in my neighborhood looked really photogenic, with Nounou, the Sleeping Giant, in the background:

Octopus tree (schefflera) in full bloom

In this close-up you can see that the local name comes from the shape of the flowers.

Close-up showing the red stalks of the flower spread out like octopus legs

Nevertheless, the plant is invasive and will grow readily in pastures and roadsides. It does need water, but where it finds it, it grows profusely. Fortunately, it doesn’t seem to spread to easily into established forests.